
VL V8 HDT Replica
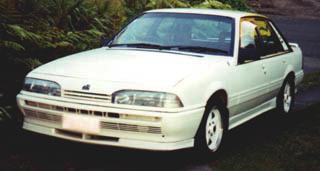
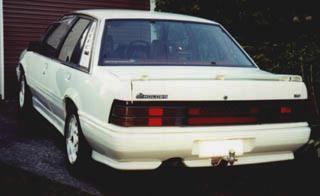
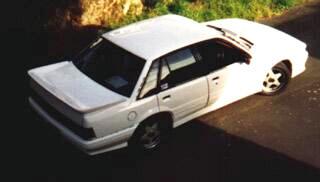
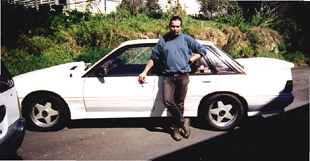
 When I started with my project back in 1996, I wanted to build a VL Group A SS replica. The Brock variety that is. This picture shows a genuine Plus Pack SS. There were only 500 of these beasts built by HDT (Holden Dealer Team), which was headed by Peter Brock. Each one of these individually numbered cars consist of a VL Commodore, powered by a 4.9 litre V8 driving the rear wheels through a Borg Warner T5 five speed gearbox. The dark burgundy car looks outstanding with its mild body kit (A direct copy of the full Group A racing kit) and its 16" Momo 5 spoke wheels. Sporting 4 wheel disc brakes and a HDT suspension package, the handling of these vehicles surpassed many other Australian built rivals. The interior got some attention too at HDT, and had Scheel bucket seats in the front and momo steering wheel. This particular car had the infamous 'Polarizer' fitted, which amongst other things saw an end to the HDT/Brock and Holden affiliation. These cars are a collectors item now, and this one sat on a yard here in NZ for more than NZ$40,000.
I started off by purchasing a 1987 Holden Commodore Berlina factory fitted with a 4.9L V8 and a 3 speed trimatic.
 It came with a factory body kit, Granddad style window cowls (which were the first items to be binned), and factory 15 mags. I drove and hooned this car around for quite a while until the Trimatic (suitably dubbed 'truamatic') gave up the ghost and lost all life. I fitted a Holden M21 four speed box into it which made it a whole new car. Took a bit to get the clutch pedal and all that in, but with the low 1st in the manual, man did it leap off the mark!. I would have liked a T5 5 speed, but I couldn't afford one. I also installed a K&N air filter. You could feel the difference in performance and as it was it kept up quite nicely with a VN SS. I scraped together enough dough to purchase a Group A body kit copy from Top Town Spoiler world in Tawa. Unpainted, I drove the car around for many more months, fixing little problems like anti-gravity gear sticks that tended to follow the drivers hand perfectly out the window! And MAJOR oil leaks. After all the thrashing and racing and hooning the little standard V8 got a bit sick and started to smoke just a little. (perhaps because I was still used to revving the nuts of a car as well from my Mazda 323 days). This came to such a bad state that I had the car officially ordered off the road by the NZ Police, but fortunately not pink stickered!. Good thing it actually happened that way as the oil that I went through was costing me an arm and a leg.
So after a lot of umming and ahhhrrrring I pulled the motor apart to take it from this:
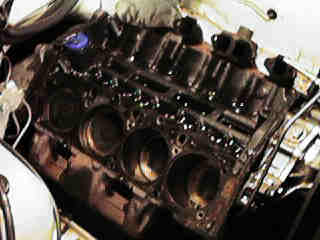
 To this:
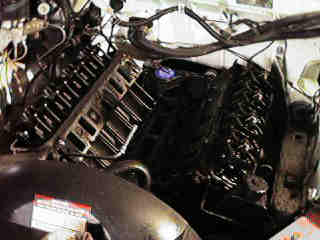
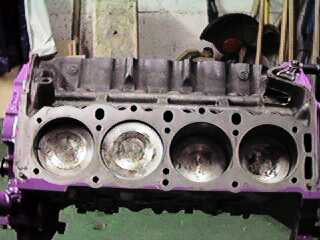
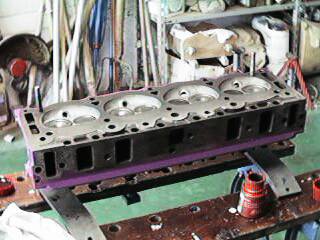
Which is the first major step of the restoration process. And after a whole nights hard work, I managed to get both cylinder heads off. It turns out that everything inside was better than I expected. No burned valves, no scratched bores. So its off with the heads to the re conditioners and get new valve guides installed. Might even get a few thou' planed off to raise the compression a bit. And maybe bore the block out to 5.0 L instead of 4.9 L.
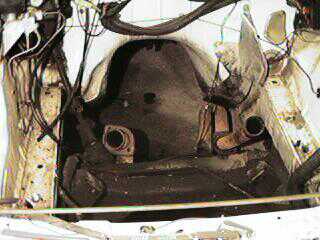
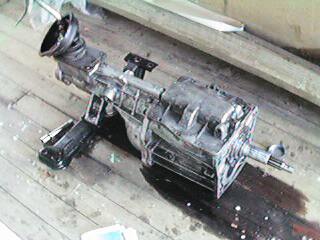
 Three months pass and we feel inspired again, and decide to finally pull that donk out! so we start with a wee bit of preparation, like taking the gearbox out (which was a big stumbling point as I had that thing in and out about 8 times already with fitting it the first time). Disconnect everything, drain
the remaining oil, and water. and hoist it out.
Three months pass and we feel inspired again, and decide to finally pull that donk out! so we start with a wee bit of preparation, like taking the gearbox out (which was a big stumbling point as I had that thing in and out about 8 times already with fitting it the first time). Disconnect everything, drain
the remaining oil, and water. and hoist it out.
During this time we have purchased some aluminium rocker covers, a Pete Jackson Gear Drive and a genuine HDT Group-A cold air tray (as fitted to the race cars). Along with some look good HDT SS badges.
With a bit of help from my good brother we have a Commodore with ZERO horses under the hood! :-) And after a lot of heavy lifting, groaning, stumbling, and puffing the donk settled in its temporary resting place.
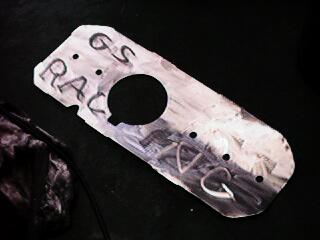
Its two days before Christmas and I get a niggling to do some more work on the project. What to do... What to do.... Eh, why not cut a huge hole in it. yeah.. that's a cool thing to do.. So I got the tin snips, can openers, files and jigsaws out and cut a hole in the upper firewall for the 'cold air try' to fit through, and this is the finished result. It was also nearing Christmas so I bought myself an engine stand to be able to work on the engine properly.
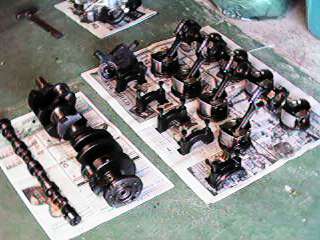
I stripped the rest of the engine down. I found the main crank and con rod bearing shells to be excessively worn, and we also found two broken rings. Othe r than that all the rest was in pretty good shape. Now all that needs doing is sorting out who can hone the bores for me cheaply and also grind me a cool semi-lumpy, but still street able cam shaft. Don't engines look simple once they are broken down to the basic components?

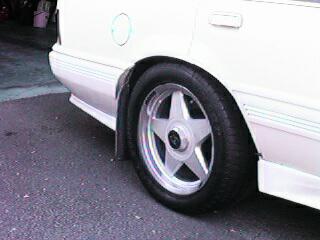
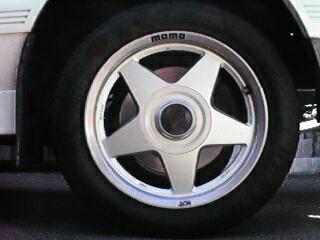
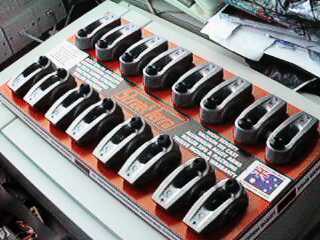
I managed to lay my hands on a set of FIVE, yes five GENUINE HDT/MOMO 16" MAG WHEELS! The ultimate finishing touch to any replica has to be the outside trim, and these trim the car off nicely!
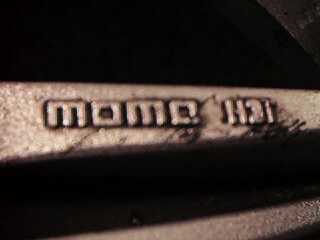
The image to the left shows how the 'HDT' logo is moulded on the inside of the spoke, next to the Momo logo.
Its definitely going to have to have a paint job now, because once its group-a red, no one will be able to tell the difference.
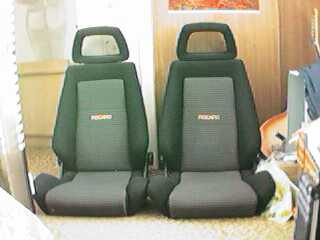
I also scored some second hand Recaro's. They came from a Irmscher Isuzu Trooper (the first HDT commodores had Irmsher mags on them BTW). Rather nice items with the drivers side having a heated back and seat bottom.
Unfortunately my other beast, A 4 cylinder, 1900 cc 1984 VK Holden Commodore decided it had enough of my rough treatment and decided to retaliate by throwing a few bearings in the motor somewhere, I have no idea where as I replaced the whole motor. Couldn't be bothered stripping the thing to bits. :-) Problem is it cost me a few bob, so I had to recover from that.
I bought some gas struts for the bonnet and some springs to hold the boot lid up as per HDT spec, courtesy of Sawyer Auto Spares in Auckland (the HDT dealers for New Zealand). The springs keep the boot lid up with the extra weight of the rear spoiler.
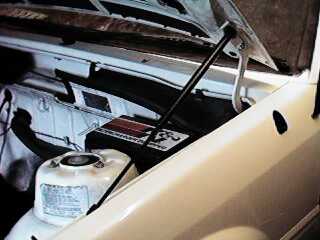
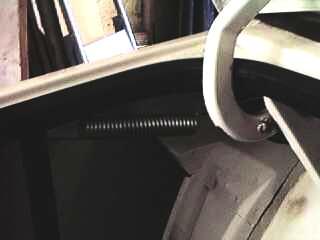
Some advice to anyone fitting these to a VL Commodore: Forget about mounting the bottom ball joint of the strut through the original guard bolt hole. Instead, measure up about 5 cm from the 5th bolt from the windscreen, drill a hole, and mount the ball joint there. It gives heaps more bonnet swing, and still keeps the hinges clear of the body work.
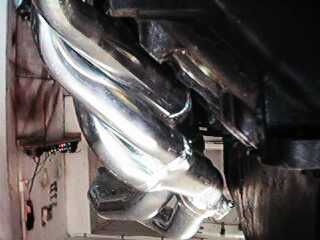
I also got a big bore exhaust and some extractors, thanks to Chase Auto Components in Lower Hutt.
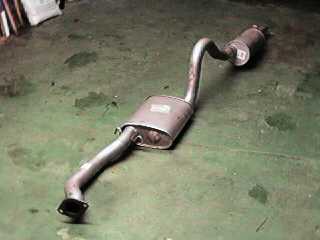
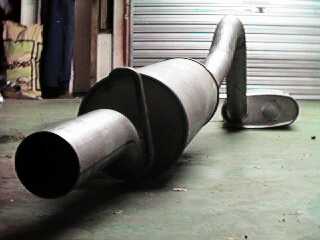
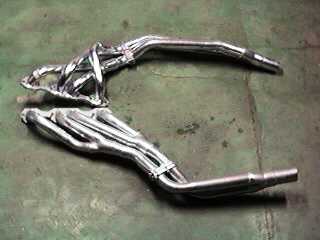
Pity the nice shiny coating will be covered up by exhaust wrap.
Here's a little trick I thought of to turn chrome on a car into sporty looking black chrome. Go to your nearest sign writing outfit, and purchase some satin black sign writing film. Pull the chrome trims of your car, and clean it with some methylated spirits. Carefully cut the film into the required length's and apply it to your chrome, wrapping it around all the edges and smoothing out bubbles as you go. Don't worry about the little bubbles that may creep in. they come out over time as it settles.
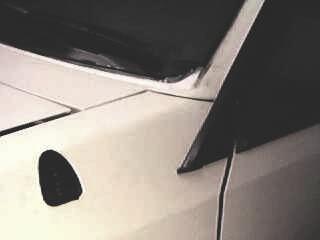
This is the aerial mount and the front window corner by the mirror. If you want to be REALLY cool, I suppose you could get some of this Carbon Fibre look alike film from Folia-Tec. or some different colours to really set your car off! :-)
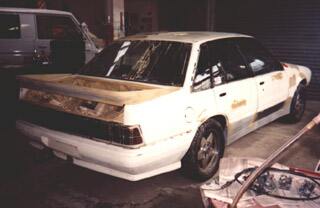
I also fitted some Group A Homologation Special side skirts. These units flare out at the front and the rear by about 5 cm to match up with the flare of the front air dam. 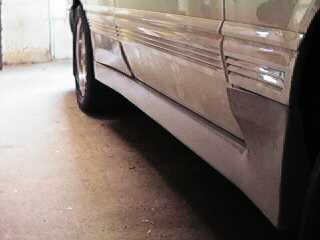
After some saving and some hunting around we source a set of Street Terra Roller Rockers thanks to Road and Track accessories in Lower Hutt.
Still deciding weather to go for a mechanical cam or a hydraulic cam (i.e., hydraulic or solid lifters).
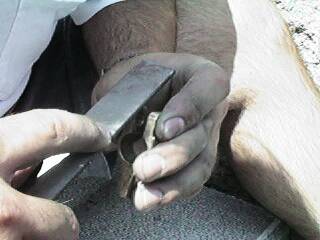
After a LOT, and I mean a LOT of polishing I finish off my con rods to bring the standard items up to scratch. The aim here is to remove any sharp edges and casting/forging marks so that there is no place for cracks to start. Trust me, I wish I had a V2 whilst I was doing these! :-) Here's the standard item with the modified item next to it.
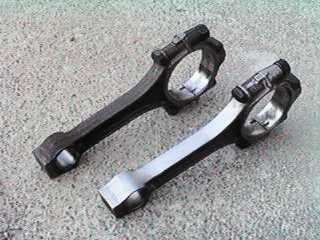
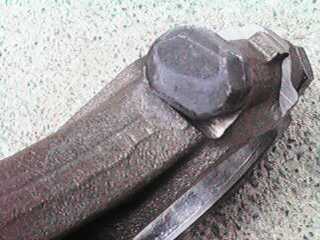
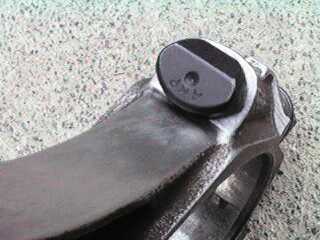
A close up view showing the standard and the modified (fitted with the ARP rod bolts!) If you need to get stuff shot peened, go and see the guys at Shot Peening Services in Auckland. I send my rods up there on a Thursday, they arrived at their workshop on Monday (a slight problem with the merger between Ansett and First Couriers) and I got them back on Wednesday!. An excellent prompt service.
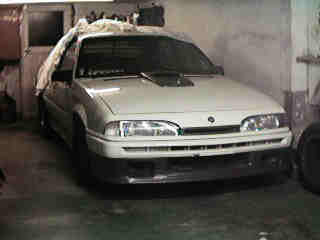
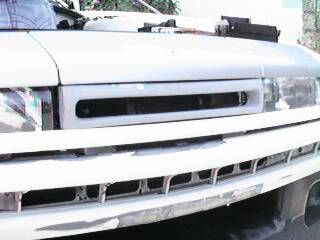
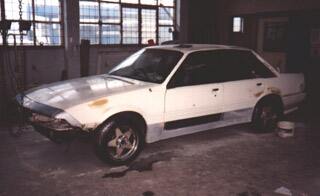
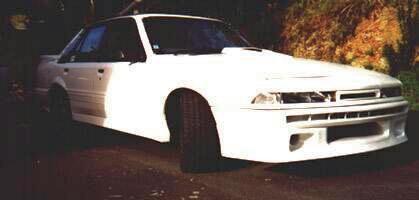
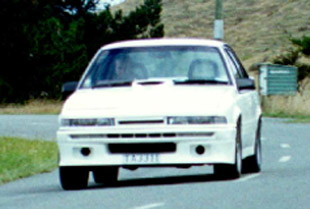
After a bit of thinking I decided to swing away from creating a replica, and go for a all out Head Turner. The cost and work involved in painting the car and having to do the interior got just a bit too much (in fact, with the amount of money I have spent on it already I could have had a genuine SS). So I figured, why not create a Commodore that looks like no other and is all my own creation of custom glory. Hence me purchasing a Calais front end, and mounting that on my vehicle. I reckon the slim headlights make it look like its angry, ready to do business.
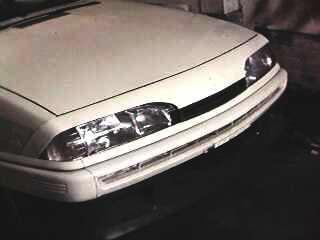
Here's a pic of the standard front as what is fitted to the berlina's with the exception of the group A air dam and grill. (a bit of a girly looking front I think, like a cow with big daisy eyes! :-) )
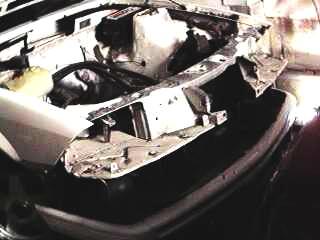
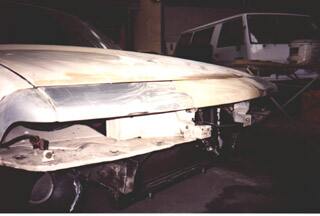
Here's a piccy with all the necessary front pieces removed to get the Calais front on.
And finally the angry mean looking 'Don't Mess With Me!' front :-)
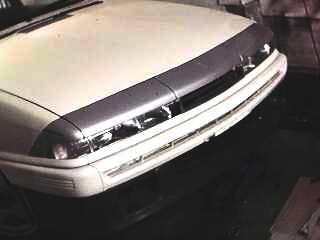
To do this is not actually a big job. it took me less than a day to rip the old front off, and put this one on. It required some adjustments here and there to get the panels to line up, but other than that everything fits. And it used the same amount of nuts and bolts that came out of the old front. Thanks to the guys at Kiwi Auto Parts in Auckland for supplying me with all the bits! I also wired up the flaps so they only come up when the high beams are on. It makes such little difference to the light output that there's not much point in motorising them at all.
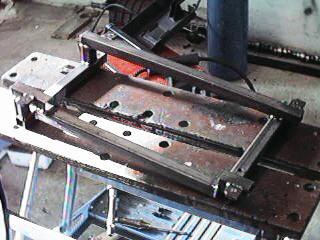
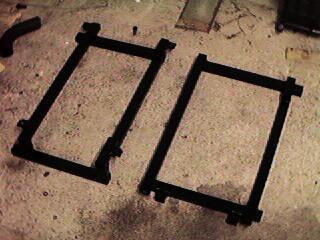
We trail fitted the seats to see how high and where about they should sit. Making the seat frames out of wood enables me to find out how much metal bar I am going to need.
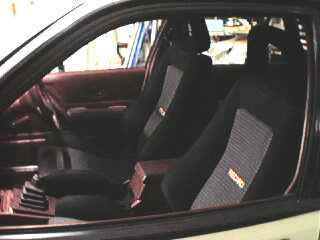
They don't actually look much out of place. I was afraid that they would look too small in the bowels of the Commodore. Even the colours of them go well with the burgundy interior. Once I had the seats where I wanted, I made the brackets out of steel. These mounted on top of the Commodore rails so the height adjustment for the drivers seat was still in place.
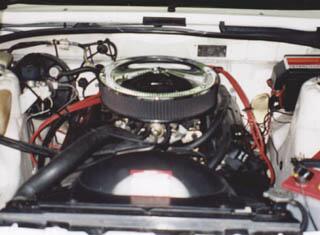
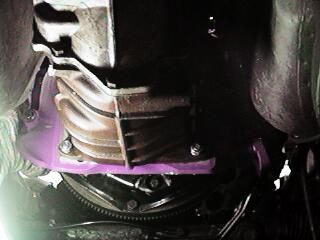
I get the motor back from Cummings Engine re conditioners, Honed, Planed, Decked, Polished, Re sized and Balanced. It had two valves replaced, and one cylinder re sleeved. Amazing what difference a trained eye and some fancy gauges can make. Here was I thinking all was alright. Yeah right! I trial fit some of the components and notice that the right hand side exhaust header barely clears the block, this could be a small problem when I wrap the Thermo-Tec insulation tape around the pipes.
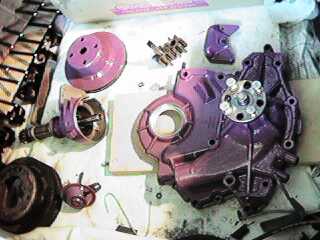
We start painting the block and heads and various other bits and pieces that I want in my cool shocking Purple colour. :-) I thought I'd have a sneak preview of how its going to look.
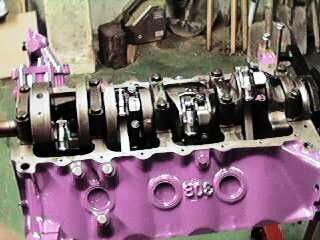
We put the crank and the pistons in the block, and mounted the oil pump on it. This is all I can do on the motor until I get a camshaft.
Bored one night, so I got carried away with the paint and did some careful detailing on the air filter.
The weekend hits and we put our new bearings into the ol' M21 Four Speed. This gearbox will have to do for now until I can afford a 5 or 6 speed of some sort. :-)
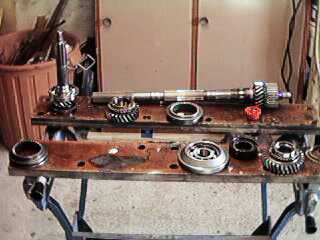
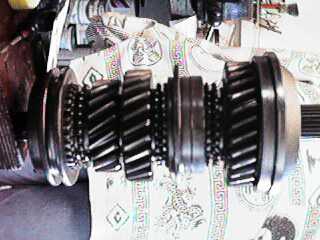
The gearbox disassembled to the left, and the main shaft assembled to the right.
Placing the roller and needle bearings was a bit of a drama. Lots of sticky grease and a fiberglass rod (non-magnetic you see) aided a lot when one doesn't have the proper tools. :-)
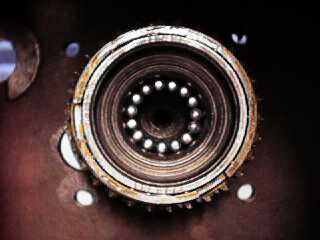
And finally, the gearbox is as one again :-). Almost like a new one. No more ugly grinding, crunching, and other weird noises coming from within.
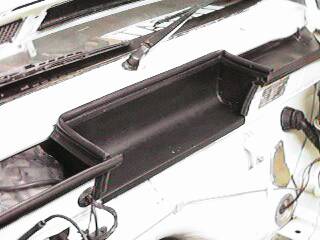
I used some aluminium sheet to make the back end of the cold air box. This piece joins the bonnet scoop with the air box that goes around the air filter when the bonnet is closed.
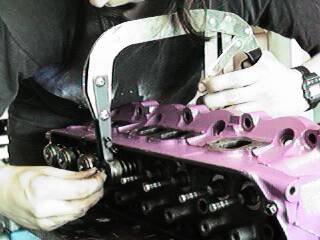
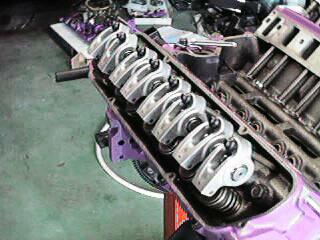
I receive my Camshaft and valve springs from Kelford CamTech so some more major construction work takes place. We grind the valves and put the valve springs on. This completes the heads for installation.
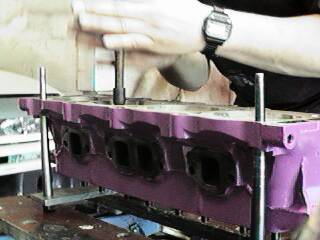
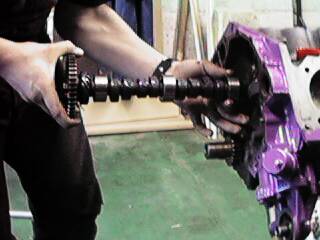
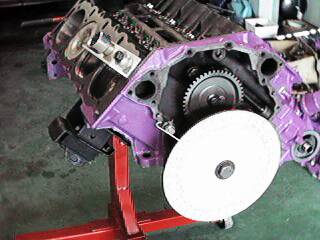
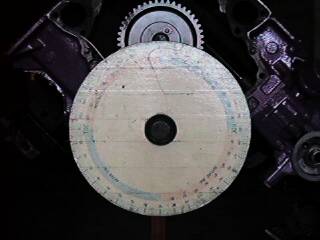
I put the cam shaft in and my brother helps me dial it in. This is to overcome any incorrectness in grinding of the cam or crank and to ensure that the valves open and close when they should. These pictures show me sliding the camshaft into position and the home-made dial indicator and home-made piston stop. Finally placing the heads on top as well.
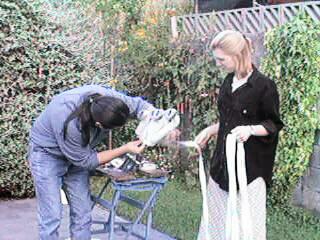
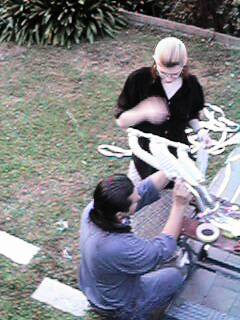
To make the headers more efficient people use Thermo-Tec exhaust wrap. I bought some stuff that is glass fibre tape just like the real stuff, bought from Forman Insulation. My girlfriend at the time helped me out with this tedious job

I then set her to work cleaning the underside of the bonnet. And what a fine job she did, it looks like new. Meanwhile my made Eddie polished up my brass battery terminals.

Wow, certainly beats paying $60 for a set of so called 'Gold" terminals from the car stereo shops!.
Whilst all that was happening, I put in my genuine HDT LE grill. As the pirate grill I ordered was in shocking condition and didn't fit, I ordered one from HDT (Sawyer Autospares) themselves. I also spent some time removing the number plate mounting points from the front bumper. Its going to have a stick on plate so as not to block the air vents.
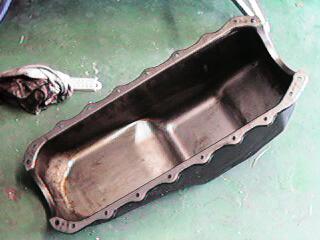
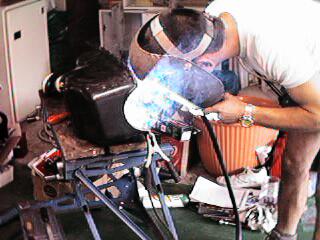
To stop the oil from sloshing around with my hard driving I decided that I should put some baffles in the sump. Lots of room for the oil to splash about there. so we start with a baffle to reduce oil flow to the back of the sump.
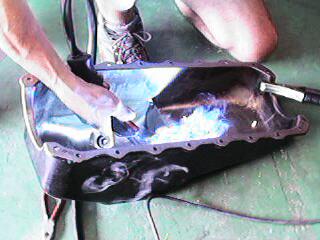
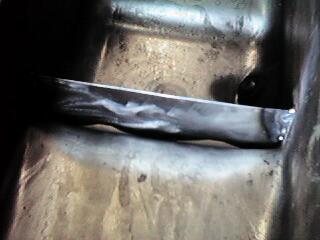
Here's my cool bro welding the first baffle in, and to the right the finished baffle with return holes punched through.
To stop oil from splashing back up towards the crank, we make up and install a plate that sits lengthwise in the sump. The big hole is there for the oil pickup to go through and the edges have been made so oil can flow down the sides of the sump. The little holes are there for any oil that flings of the crank to drain.
A lot of welding by my brother and me, and the top plate goes in.

And the finished product...

The outside of the sump was painted with flat black paint to aid the heat transfer to cool the oil as much as possible with a semi standard set up.
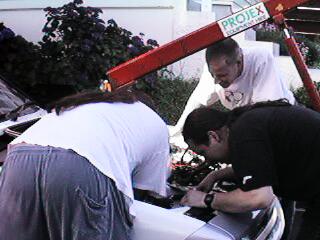
For this occasion we hired an engine crane from the lads at Projex equipment hire to make the job easier and to stop me from scratching my paint.
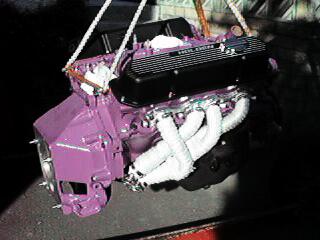
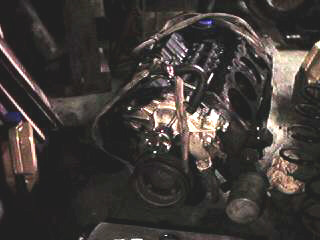
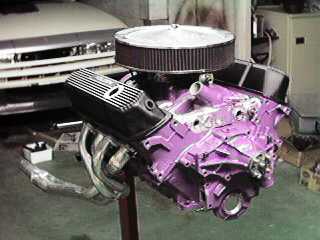
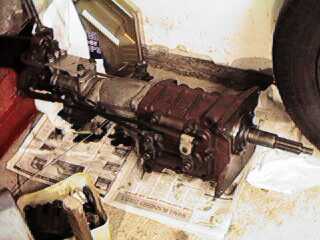
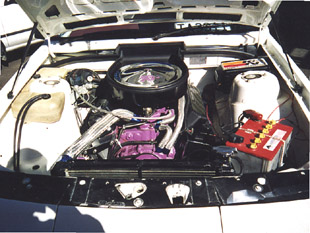
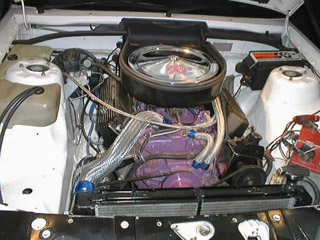
Here's what the motor looks like all built up but out of the car. Looks pretty swish to me! :-)
Carefully lowering approximately 220 kg's of iron, aluminium, brass and purple paint into the engine bay.
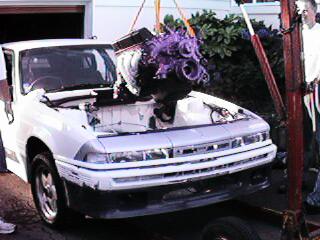
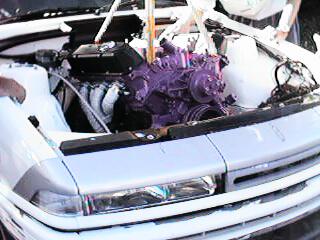
After some careful consultation with the helpers Ash and Ed and fiddling in the engine mounting bolts...
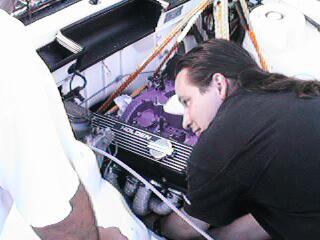
the engine sits happily in the engine bay.
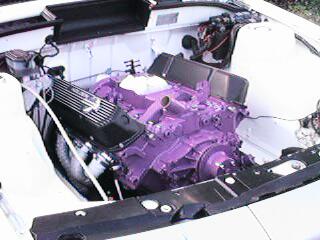
Later that day we also install the gearbox with a lot of grunting and heaving.
My great brother gives me more help and we get the exhaust together and hooked up. 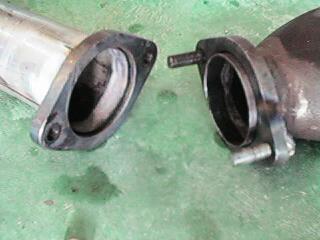
Here are the sexy looking flanges that were supplied by Total Performance and improved by Guido Seevens Racing :-) tack welded on the pipes.
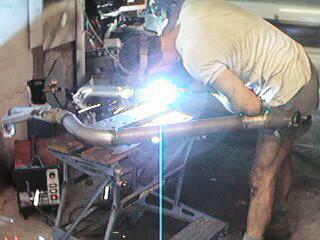
Here is my brother welding the centre piece that combines the two pipes into one. All done in 2.5 inch pipe with mandrel bends.
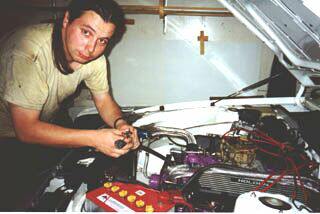
The rest of the night was spent wiring and connecting up all hoses.
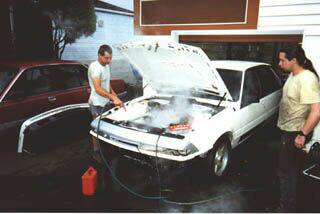
With the exhaust and all other peripherals in place, my brother feeds the hungry beast some go-go juice for its maiden start-up. It started without too many problems. I had the spark plug leads around the wrong way at first (oops). But once that was sorted out, it roared into a song of eight pistons throbbing and gears whining. Having a new cam installed the motor had to be run at 2000 rpm for 20 mins. With a car like this keeping it cool was a nightmare. As the pictures show we were squirting water on the radiator trying to keep it cool. The water splashing everywhere made something short out that caused the dash to loose power which was a bit of a worry as we couldn't see whether or not we had oil pressure, but all turned out well in the end and it now runs like a dream.
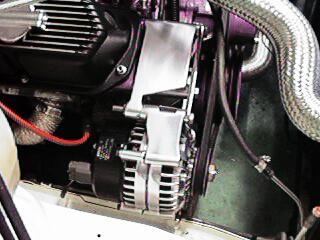
We receive the alternator back from Wellington Bumper and Grill all polished and clear coated along with the chrome plated brackets for it, and the power steering.
With all the essentials in place, I take the car for its first drive. Heart pumping and adrenaline rushed we take it up the hill. All seems fine. Smooth, even power right through the rev range. Its the motorway test that revealed something very annoying. It over heated!. Major boiling, so bad in fact that I let it all cool, before I took it up the hill again. We checked as many things as we could without dismantling the motor and over the next few days, road tested again and again, but the car overheated every single time. I decided to pull the thermostat out, and the problem became apparent. I had drained the water out of the block, yet there was still water in the thermostat housing, pointing to a major blockage somewhere between the heads and the inlet manifold. Well, nothing else to do but pull the manifold off. and there it was, The inlet manifold gaskets could be placed around either way, but one side had a hole for the coolant, the other not. I had put them in around the wrong way. New gaskets installed and bolted back together we took it for a drive again. This time the temperature stayed where it should, thank goodness, but upon opening the bonnet, another problem reared its ugly head. Water was leaking out between the heads and the inlet manifold. The water leaked into the oil as well, and gunked that up severely. I pull the manifold off again, and hold a straight edge to it that confirmed my suspicions. The overheating had bent the manifold. It had already been bent once before so when the motor got reconditioned, I got the manifold faced, which meant that this time I couldn't get it faced no more. New Manifold time!. This was a big hassle, I had to source one from Christchurch as the VL 308, has a unique manifold due to its emission and unleaded upgrade. After all that rigmarole, the motor was re-assembled and road tested once again. Its ok now apart from squirting oil out of places it shouldn't. this was fixed by giving it better crankcase ventilation. However I still think the rings have lost their tension, and I am getting blow by. Also, we were so excited to take it for a spin, that I forgot to bolt one of the sideskirts on, and it fell off during one of the trips, and me successfully running the thing over!.
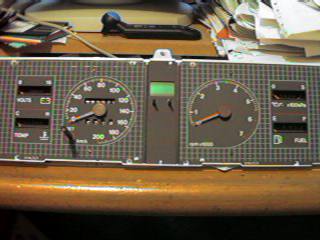
I found the boring old checkered pattern on the Commodore instrument panel a bit old fashioned.
So, we bought some Folia Tec carbon fibre look alike film and modernised the instrument panel a wee bit, much better, don't you think?

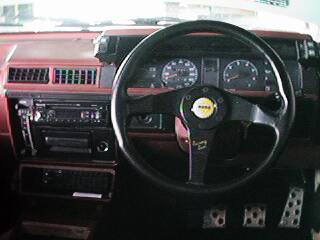
And a momo wheel for style
We managed to source a cheap Borg Warner T5 five speed gearbox! Along with a 10" clutch.
 Bit of a waste of time doing the bearings in the Four Speed, but hey, who was to know that this opportunity came so early!?. We had to get a new front drive shaft half, that mated in with the T5, this wasn't a problem, as these boxes are fitted into VN-VS V6 and V8 commodores. The centre CV is still the same so the two halves bolted together nicely, just had to get it lengthened and balanced again, but the lads at Barnicle Engineering in Taita know just what they are doing with that sort of stuff. I also had to modify the bell housing to fit the T5. Quite a nice bell housing these Graham Berry Race Car items. It was originally made to fit a Celica five speed onto a holden motor, I re drilled it to fit the Holden Four Speed, now it's had all holes filled in, the centre bearing guide hole enlarged, and new holes drilled to fit the T5.
The cross-member had to be modified as well. It lined up right, but it was too high, so we removed the upright on it and cut it down and rewelded it. It still looks like a factory item.
With a bit of preparation the previous week in pulling all the trims and fittings off, the car goes into the paint shop for the preparation of the body.
A whole day was spent on the front nose panel to get it straight and smooth as it had a calais badge that had been painted around a couple of times.
The end Result...
The car had to handle better and sit lower than normal so it got fitted with Monroe shocks, King springs, and an adjustable panhard rod.

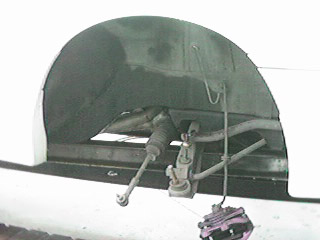
On the hoist at Total Performance and Ron is pulling the struts out.
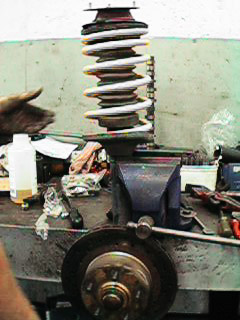
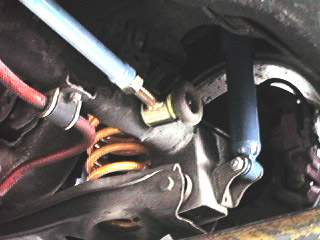
The finished strut and the technicolour dreamcoat rear end.
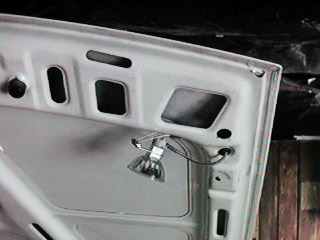
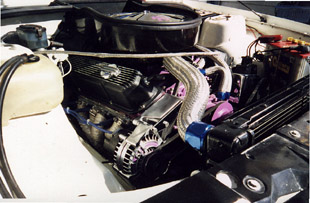
As the car was going to be a bit of a show car and the bonnet would be lifted quite often, I fitted some lights to illuminate the motor.
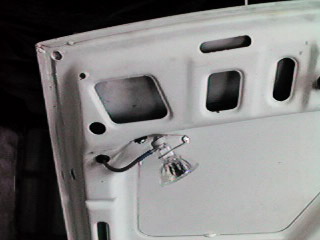
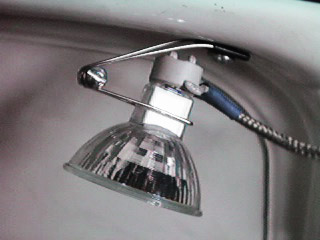
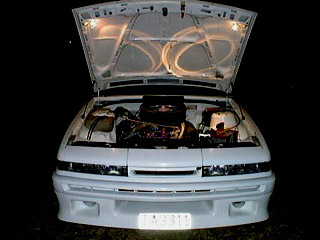
and a close up view and how it looks at night
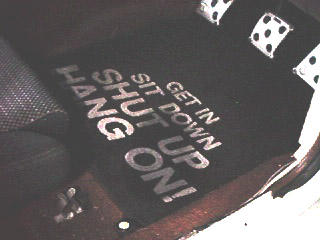
Doesn't need any explanation really does it! :-)
Once electric window mechanisms were fitted to the doors I needed a way to control them. I managed to score some electric window switches out of a Nissan Stanza that after a bit of rewiring did the job.
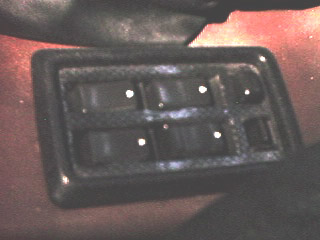
Not the best photo but it shows how they were mounted in the original switch mount (the original switches were broken and missing). Dressed with carbon fibre film they look almost factory apart from the two extra switches at the front.
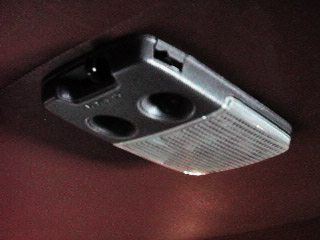
I never liked the interior light fitted to Commodores, but I did like the light fitted in Mazda's. Solution? fit a Mazda light.
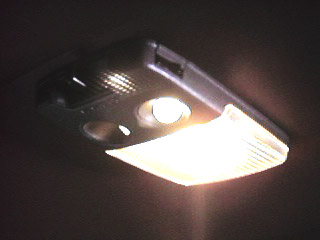
Off and on! :-)
These are quite an easy fit. No extra wiring or mods needed. Just need to cut the head lining a bit, and drill a new hole in the roof mount and also cut some clearance in the roof mount. Once fitted the map lights shine nicely on your lap and can be operated individually from the main lamp so a passenger can read without blinding the driver at night.
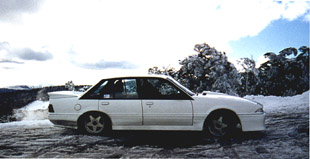
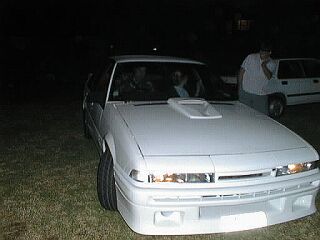
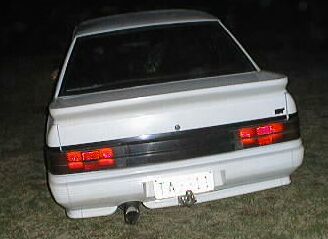
Well folks. here are some shots of the car as a finished product. I had plenty more planned for it but it got stolen by some low-lifes out of a locked garage on the 2/9/99, along with all my tools and the alarm that I had for it which was sitting in a box on the floor next to the car. So far I have come across the mag wheels as they were serialised. I have been behind a VK that sounded EXACTLY the same as the motor in this did. They hooned off after I followed them a bit. Makes you wonder really. Did these pricks get enjoyment out off the money they made stealing it??? As for me, it still brings a lump to my throat every time I look at these pictures. I hope you bastards feel satisfied that you stripped me of my pride and joy, and I sincerely hope that you get what's coming to you! I will not give up on finding out who was responsible. once in a while someone or something gives me some clues. One day... One... Day...

Make: |
Holden |
Model: |
Commodore - Berlina |
Engine: |
|
Number of Cylinders:- |
8 in a 90 degree V configuration |
Capacity:- |
4987 cc |
Bore:- |
101.6 mm |
Stroke:- |
76.8 mm |
Compression Ratio:- |
8.5:1 |
Carburettor:- |
Quadrajet - 4 barrel |
Air Filter:- |
K&N Round 340 mm diameter 70 mm high with cold air intake box |
Intake Manifold:- |
Standard Holden VL |
Cylinder Heads:- |
Standard Holden VL |
Valves:- |
Standard Holden VL |
Rocker Gear:- |
Street Terra Roller Rockers |
Push rods:- |
Standard Holden VL |
Pistons:- |
Standard Holden VL |
Con rods:- |
Standard Holden VL, Polished and Shot peened |
Rod Bolts:- |
A.R.P |
Crank:- |
Standard Holden VL |
Camshaft:- |
Comp Cams No HL 268H-10 |
Exhaust headers:- |
4 into 2 into 1 2.5" single pipe system |
Ignition:- |
Standard Holden VL Electronic |
Drive Train: |
|
Flywheel:- |
Cast Iron |
Clutch:- |
10" |
Pressure Plate:- |
Standard |
Gearbox:- |
Borg Warner T5 |
Ratios 1st:- |
3.25:1 |
2nd:- |
1.99:1 |
3rd:- |
1.29:1 |
4th:- |
1.00:1 |
5th:- |
0.72:1 |
Drive shaft:- |
2 piece |
Differential:- |
Standard 3.08:1 |
Brakes: |
|
Master Cylinder:- |
Standard Holden VL V8 |
Front:- |
Cross Drilled & Slotted Disc |
Rear:- |
Standard Disc |
Callipers:- |
Standard Holden VL V8 |
Pads:- |
Metal Kings |
Suspension: |
|
Front:- |
30 mm Lower King Springs Monroe GT Gas shocks 30 mm Sway bar Nolathane Bushes |
Rear:- |
25 mm Lower King Springs Monroe GT Gas shocks 18 mm Sway bar Nolathane Bushes |
Wheels:- |
16"x7" |
Tyres:- |
225/50/r16 |
Performance: |
|
0-100 km/h:- |
6.5 sec |
400 metres standing start:- |
Not yet spec'd |
1st Gear max speed:- |
65 km/h |
2nd Gear max speed:- |
106 km/h |
3rd Gear max speed:- |
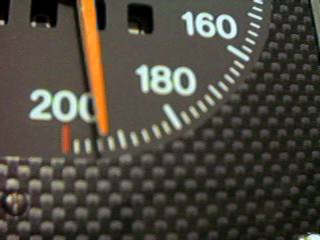
163 km/h |
4th Gear max speed:- |
off the clock (211 km/h calculated) |
5th Gear max speed:- |
Not yet spec'd 293 km/h, if redline of 5500 rpm could be reached! However considering wind resistance I'd say it would be like a Brock SS which is spec'd at 221 km/h, or a Walkinshaw which sits at 230 km/h |